

HELM Original & MKII Complete 50 Hour/Lower Service Instructions (Part 2 of 2)
Mar 2022 orig.
Recommendations and Warnings
Cane Creek recommends only trained suspension technicians perform service on all suspension, using all required tools and following all proper procedures. Anyone without access to the proper equipment or with any concerns on the procedures should defer to an authorized Cane Creek service center for service. Improper service can result in loss of performance or suspension failure. All Cane Creek forks have pressurized oil. Follow the service procedures exactly as written to avoid possible injury or harm to the suspension. Always wear eye protection while performing suspension service. Please dispose of all waste products and materials through proper channels to avoid contamination of the environment.
Any damage or issues resulting from improper service will not be covered by warranty. If you have a fork still in its original warranty period and do not wish to void your warranty, please contact an authorized Cane Creek service center.
These service instructions cover the basic service procedures using standard service kits. If your suspension requires parts beyond standard replacement parts – CSU, compression rods, etc. – please consult your authorized Cane Creek service center or contact us at our Cane Creek Support Center.
Service Notes
These instructions cover 50 hour lower service which is the first step in both the complete 100 hour damper and spring service.
The process is identical for original HELM and HELM MKII. A HELM MKII is pictured here. The basic process is the same for AIR and COIL forks. Any minor differences are noted as needed.
Service Kit
BAG0409 – HELM 50 Hour Service Kit
Required Cane Creek Tools
None
Additional Tools & Supplies
Sockets – 13mm
Crowfoot wrenches – 18mm
Open Ended Box wrenches – 13 & 18mm
Torque wrenches
35mm fork seal tool
Pick
Motorex 15wt Racing Fork Oil
Torque, Loctite, Oil & Nitrogen Specs
Torque & Loctite Chart
| Part | Torque Spec | Loctite Spec |
|---|---|---|
| Comp Rod Footnut | 5 Nm | 243 (Blue) |
| Rebound Adjuster | 7 Nm | 243 (Blue) |
Oil Chart
| Oil Location | Oil Type | Oil Amount |
|---|---|---|
| Damper Side | Motorex 15wt Racing Fork Oil | 7.5 mL |
| Spring Side | Motorex 15wt Racing Fork Oil | 5 mL |
Related Technical Service Bulletins
Review all related TSBs before performing any service.
No specific HELM 50 Hour/Lower service TSBs at this time.
100 Hour Service


If doing a full 100 hour service, pick back up on reassembly here.
Damper Service
Air Spring Service
Lower Reassembly


Step 1 – Bottom Out Bumper Install (if needed)
If removed, install new bottom out bumpers (AAG0123). Use care when pressing past bushings. Once bumpers are clear of bushings, use a rod to aid installation.
Working Bottom Out Bumper Past Bushing
Bottom Out Bumper on Installation Tool (shown externally from lower)
Seating Bottom Out Bumper
Bottom Out Bumper Installed


Step 2 – Wiper Seal Install
Presoak new foam rings (AAG0174) in 15 wt suspension oil. Using 35mm wiper install tool, press dry wiper seals (AAG0598) into lowers. Press until fully seated.
Wiper Seal on Installation Tool
Dry Wiper Seal Install 1
Dry Wiper Seal Install 2
Wiper Seal Completely Installed


Step 3 – Foam Ring Install
Install presoaked foam rings below wiper.
Presoaked Foam Ring
Foam Ring Install
Foam Ring Installed
Lowers Install


Step 1 – O-rings Install (if needed)
If not done as part of a larger 100 hour service, install the Sag O-ring (AAG0408) on spring side stanchion. Grease and install rebound adjuster o-ring (AAD1060) & foot nut o-ring (.AD0111).
Sag O-Ring Install
Rebound Adjuster O-Ring Install
Rebound Adjuster O-Ring Installed
Footnut O-Ring Install (Air)
Footnut O-Ring Installed (Air)


Step 2 – Lowers Install
Lightly grease inside of wipers. Align foot nut tabs between 10:00 & 11:00 position. Fully extend compression and damper rods. Eye ball location of foot nut tabs and purchase in lower casting. Install lowers onto the CSU assembly. Ease stanchions past wiper.
Greasing Wiper Seal
Lower Casting Tab Purchase
Aligning Footnuts w/ Lower Casting Tab Purchase
Easing Stanchion Past Wiper Seal


Step 3 – Add Bath Oil
Add 15wt bath oil to lowers. 7.5 ml on damper side, 5 ml on spring side.
Adding Damper Side Oil
Adding Spring Side Oil


Step 4 – Comp & Damper Rod Seating
Guide compression and damper rods through lowers. Using a tool to guide rods can aid installation. If rods do not seat properly in lowers, rotate rods either with a tool or by removing lowers and repositioning them.
Using Tool to Guide COIL Comp Rod Footnut 1
Using Tool to Guide COIL Comp Rod Footnut 2
AIR Comp Rod Footnut Seated
Using Old Rebound Knob to Guide Damper Footnut
Damper Footnut Seated


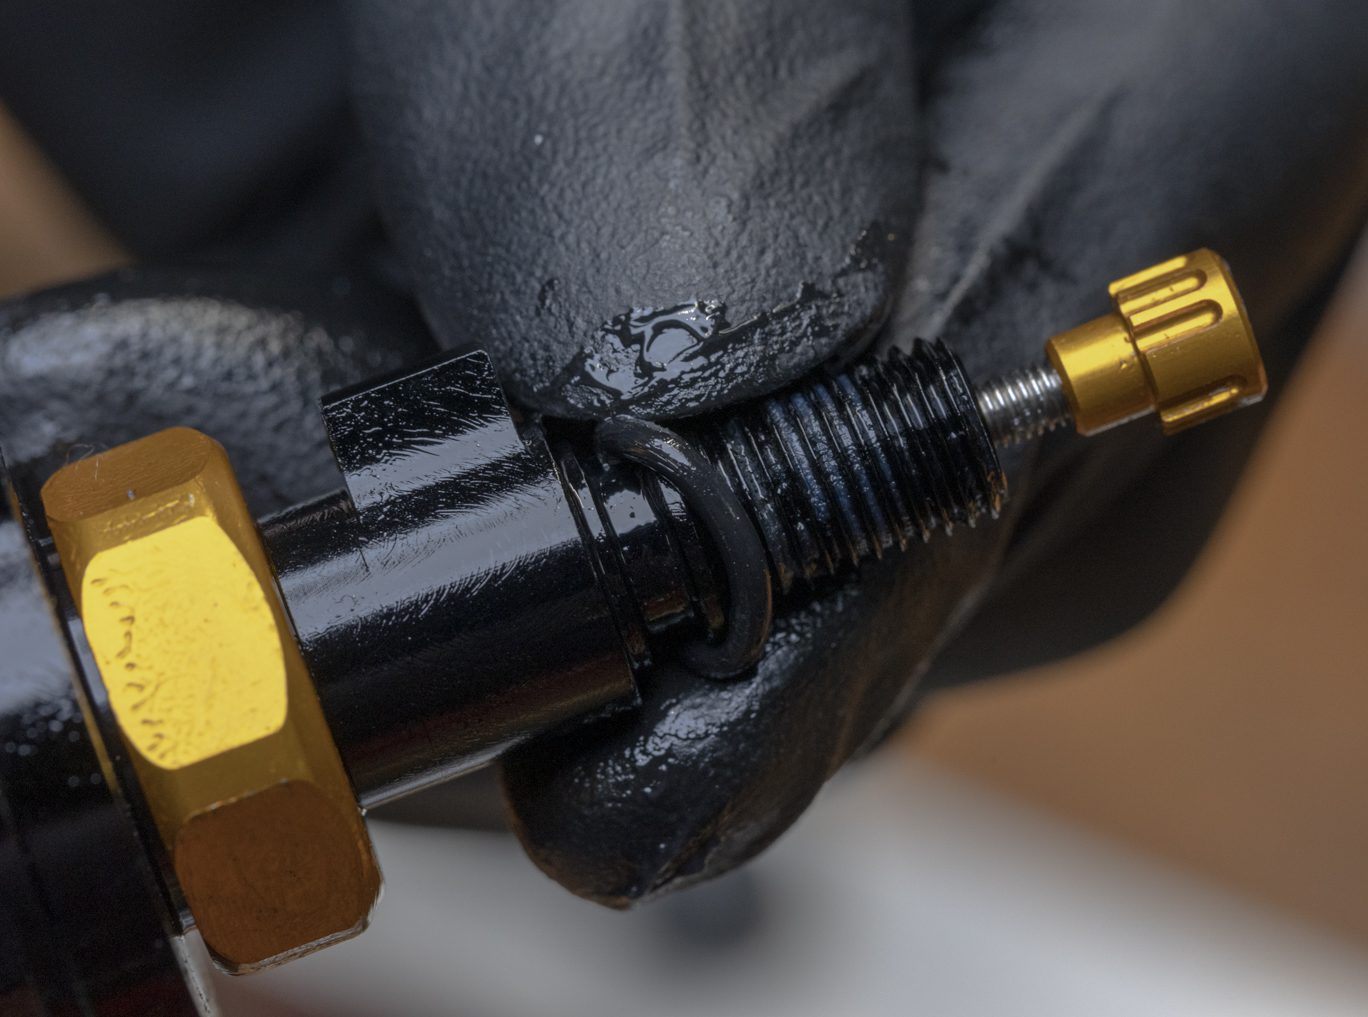
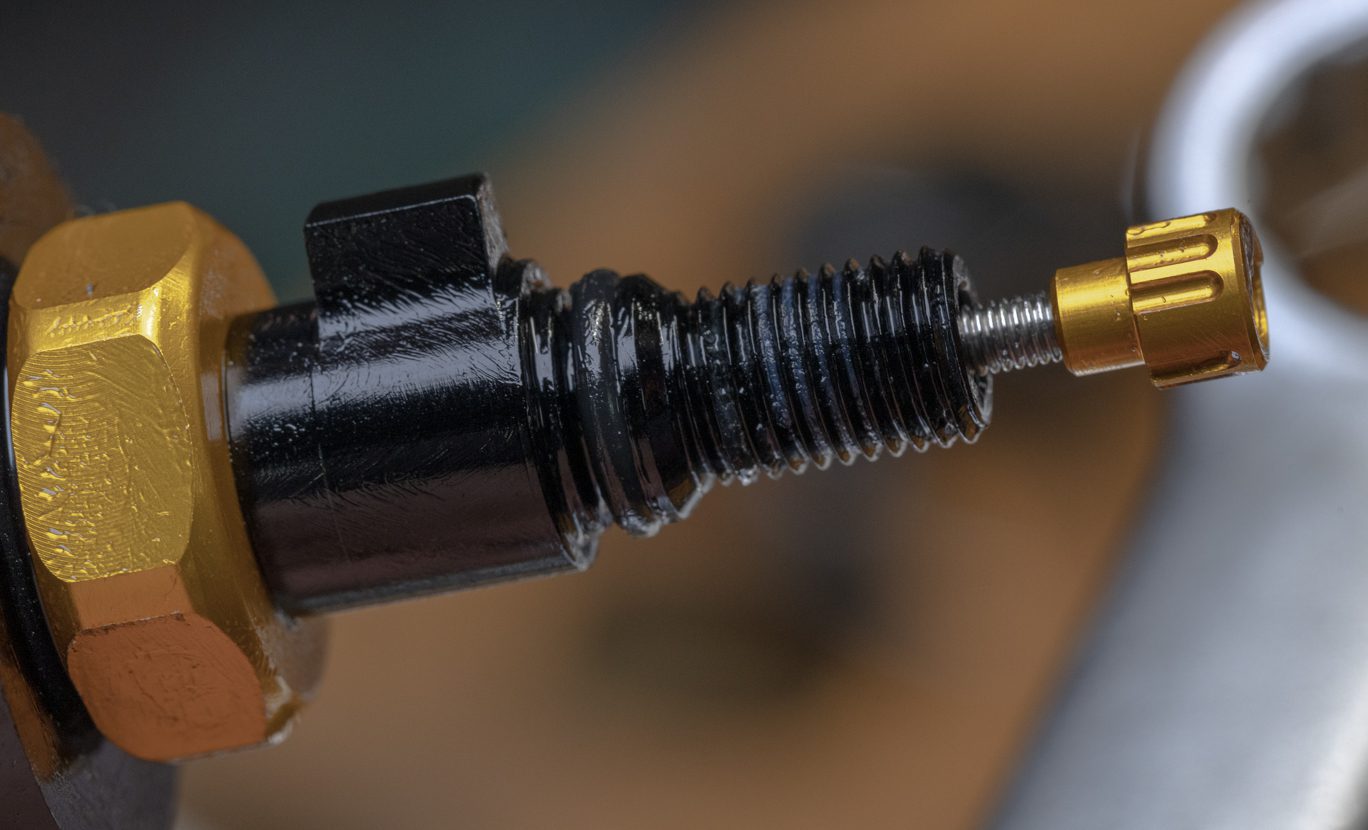
Step 5 – Footnut Install
Apply blue Loctite (243) to compression rod and rebound knob threads. Carefully start threading rebound knob on to damper rod. Take care to not push rod back into lowers. Hand thread compression rod footnut.
Applying Loctite to Rebound Knob
Applying Loctite to COIL Comp Rod
Applying Loctite to AIR Comp Rod
Hand Threading Rebound Knob
COIL Comp Rod Nut Install
Hand Threading COIL Comp Rod Nut
COIL Comp Rod Nut Fully Hand Threaded
AIR Comp Rod Nut Install
Hand Threading AIR Comp Rod Nut


Step 6 – Footnut Torque
Torque compression rod footnut to 5 Nm using 13mm socket. Torque rebound adjustor to 7 Nm using 18mm crowsfoot and torque wrench.
Do NOT over torque.
Socket & COIL Comp Rod Nut
Torquing Comp Rod Nut 1
Torquing Comp Rod Nut 2
Torquing Rebound Adjuster


Step 7 – Final Prep (Air only)
Add air pressure to fork. Equalize negative charge port. Close negative charge button. Cycle fork and check for any air loss. Install negative charge button and air valve caps.
Adding Air
Depressing Negative Charge Port
Closing Negative Charge Port
Negative Charge Port Closed
Air Valve Cap Install